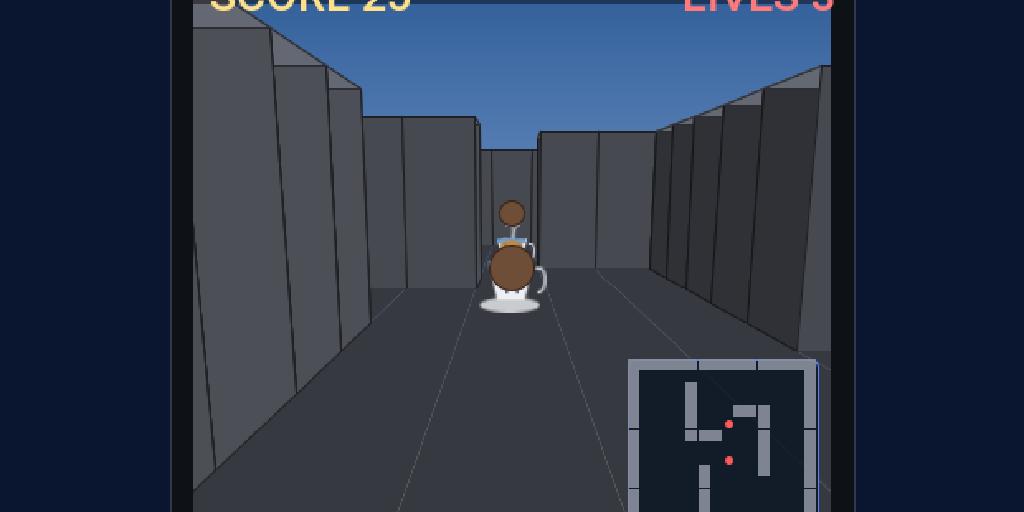
The final tutorial takes the same data-driven pattern from Tutorial 1 and Tutorial 2 into 3D. Duke’s last adventure sends him underground: Crypt Walk, a first-person dungeon of stone corridors where the tea cups have invaded his coffee break. He hunts them through the maze and fires coffee beans to smash them, while the walls box him in. The headline difference from the 2D tutorial is what happens at runtime — instead of sprites in a Scene, each element becomes a GPU-rendered Model under a perspective camera with lighting. You author the same way; the runtime renders it in 3D.
Project setup is identical to Tutorial 1 — only the mode changes:
mvn cn1:create-game-scene -DclassName=com.example.crypt.CryptWalk -Dmode=3d
mvn cn1:gamebuilder
Why 3D mode (and what “play style” means)
3D games come in families with very different cameras and controls: a flight sim has no ground, a racer follows a road, a dungeon crawler walks first-person between walls. Rather than make you wire each, the builder offers a play style — open, flight, race, dungeon — that picks a sensible camera, movement model, and collision for you, so the preview behaves like the genre while you design.
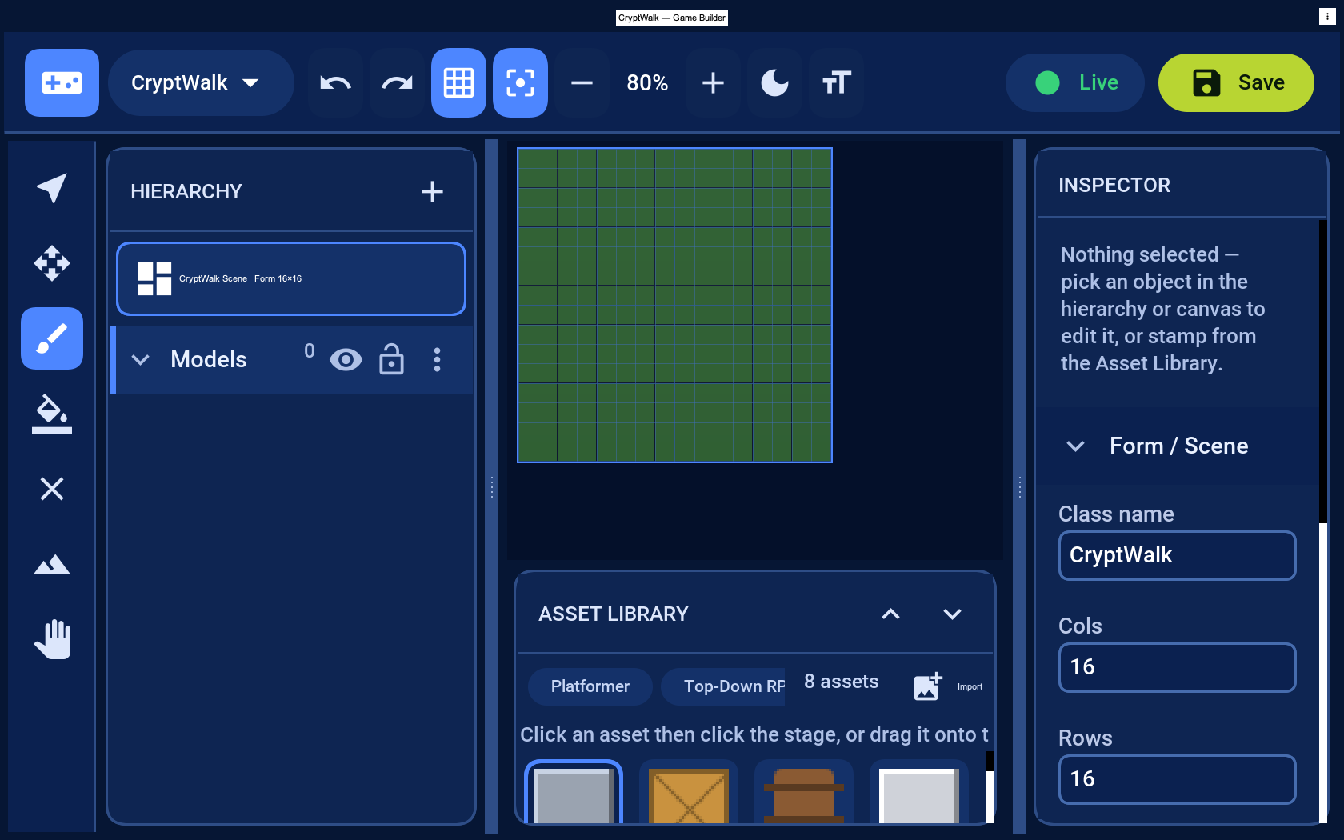
Step 1 — A 3D scene
Pick New scene → 3D Map. Placement defaults to an accurate top-down grid (toggle View → 3D: Perspective / Top-down for an angled overview). The 3D Kit pack supplies blocks, pillars, crates, a spawn and scenery.

3D assets are meshes
This is the big difference from Tutorials 1 and 2: in 2D an asset’s art is an image or a sprite sheet, but in 3D it’s a mesh — geometry, not pixels. That’s the asset model’s third format, TYPE_MESH: source points at a glTF / .glb file, and at runtime GameSceneView.buildModels loads it with GltfLoader and realizes a Model under the perspective camera and lighting.
{ "id": "statue", "name": "Statue", "kind": "actor", "type": "mesh", "source": "statue.glb" }
The starter 3D Kit stays dependency-free by building its blocks, pillars and crates from primitive meshes (Primitives.cube(...)) shaded with each asset’s colour, so you can lay out a level immediately without modeling anything. To use real modeled art, export a .glb from Blender (or drop in a CC0 model), put it in games/assets/, and set the asset’s type to mesh with source pointing at the file — buildModels loads any element whose asset is a mesh and falls back to the primitive cube otherwise. Unlike sprites, meshes are resolution-independent: there’s no DPI or frame bookkeeping, the GPU just scales the geometry.
Step 2 — Pick the dungeon play style
With nothing selected, set the Inspector’s 3D play style to dungeon. That switches the preview to a first-person walker with wall collision — the genre we’re building. (Switch it to open for a free arena or flight for an aerial flyby of the same layout; the level data doesn’t change, only how it plays.)
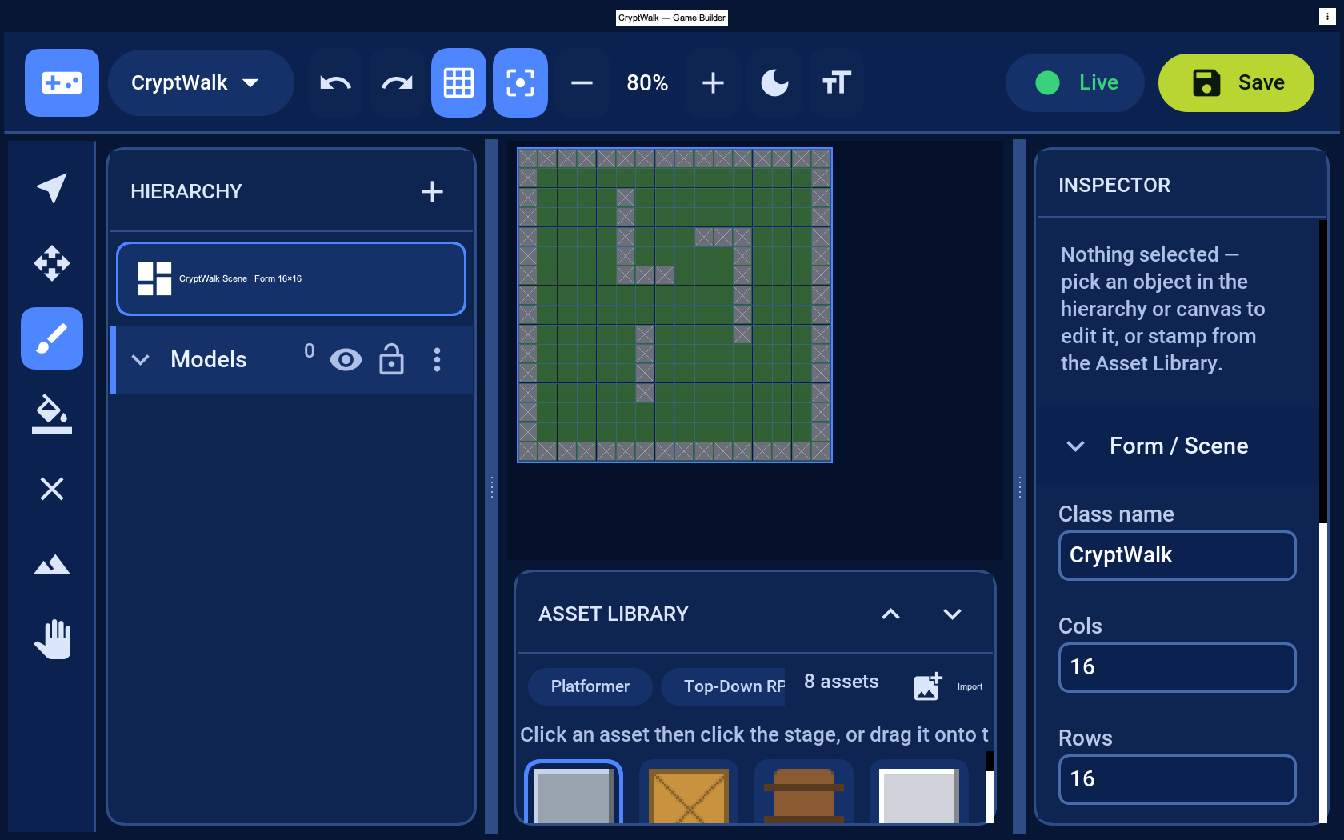
Step 3 — Build the maze walls
A maze wants continuous walls, not a row of separate posts — so build them with the Terrain tool’s Wall brush rather than placing individual pillar objects. Select Terrain → Wall and paint the maze: a solid perimeter plus a few inner walls, leaving a corridor for Duke. Each painted cell becomes a full-width stone block, so adjacent cells join into a seamless wall (and the radar shows them as solid, not dotted). In dungeon play style those walls stop the walker, and the floor is laid as continuous stone — no tile-grid gaps.
(You can still drop standalone Pillar or Rock objects from the 3D Kit as scenery; they’re great as freestanding columns, just not as a maze wall.)
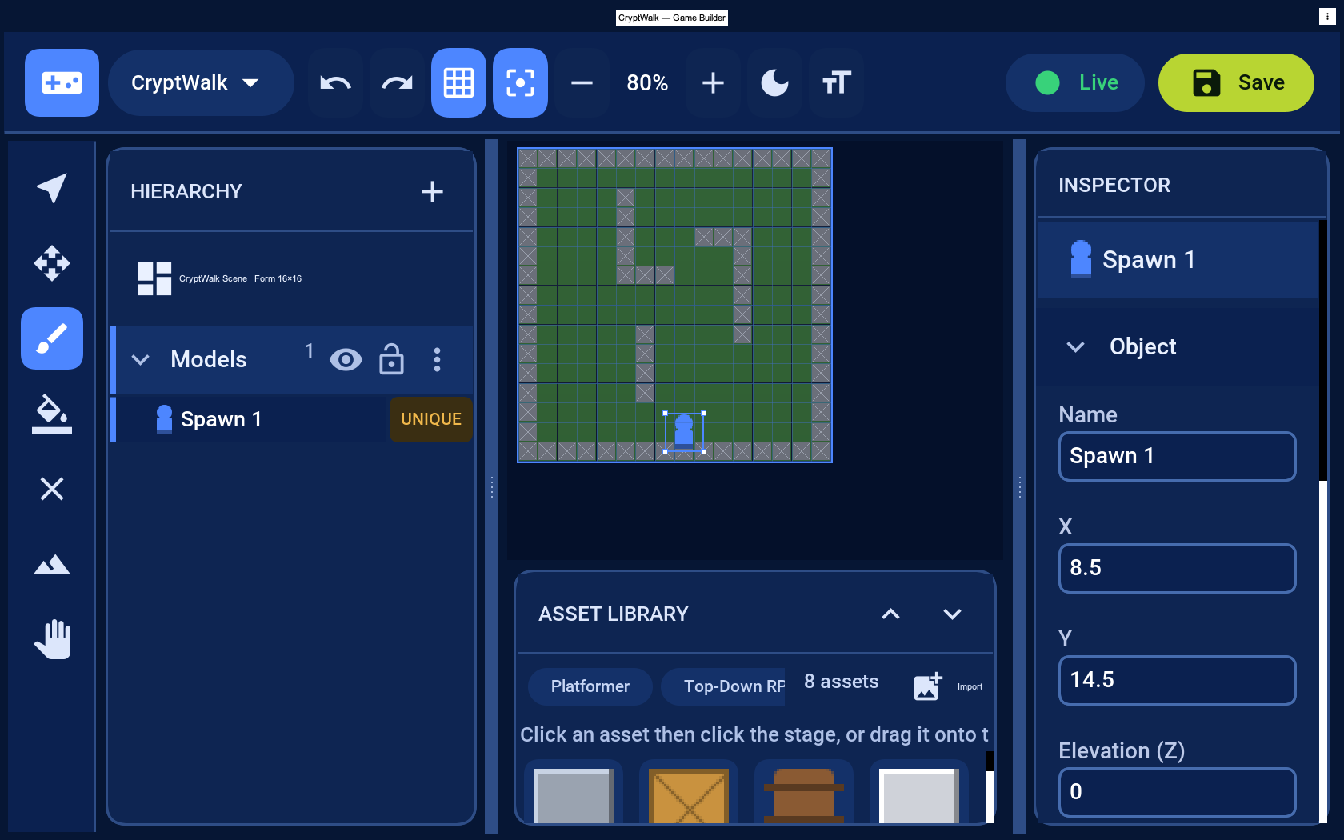
Step 4 — Add the player spawn
Place a Spawn where the player starts and tick This is the player in its Behavior section — that marks which element the camera and controls drive. Its Elevation (Z) field raises it for multi-level layouts.
Step 5 — Walk it
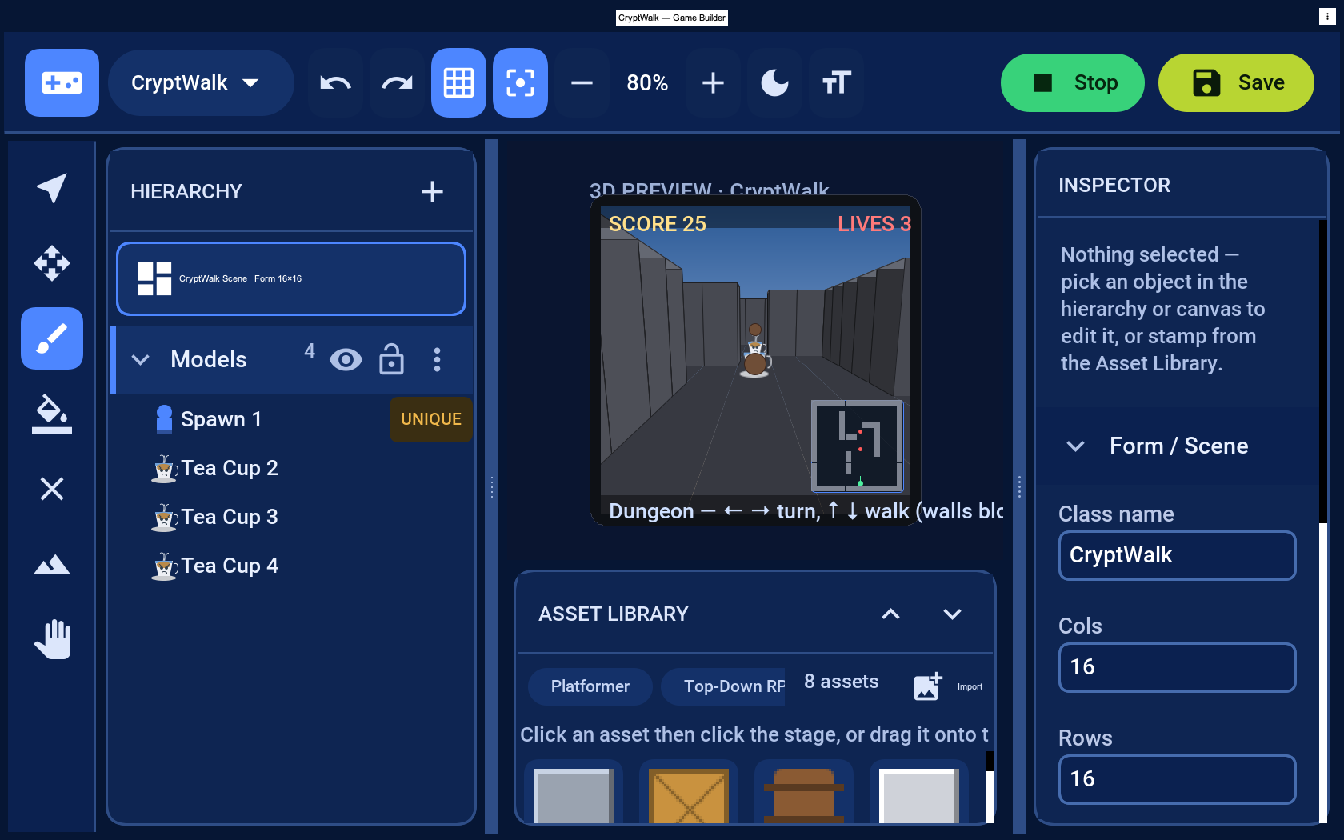
Press Live. In dungeon style you walk in first person — Left/Right turn, Up/Down walk — and the maze walls stop you like real walls. A radar in the corner shows where everything is, which is essential once a level grows beyond one room.
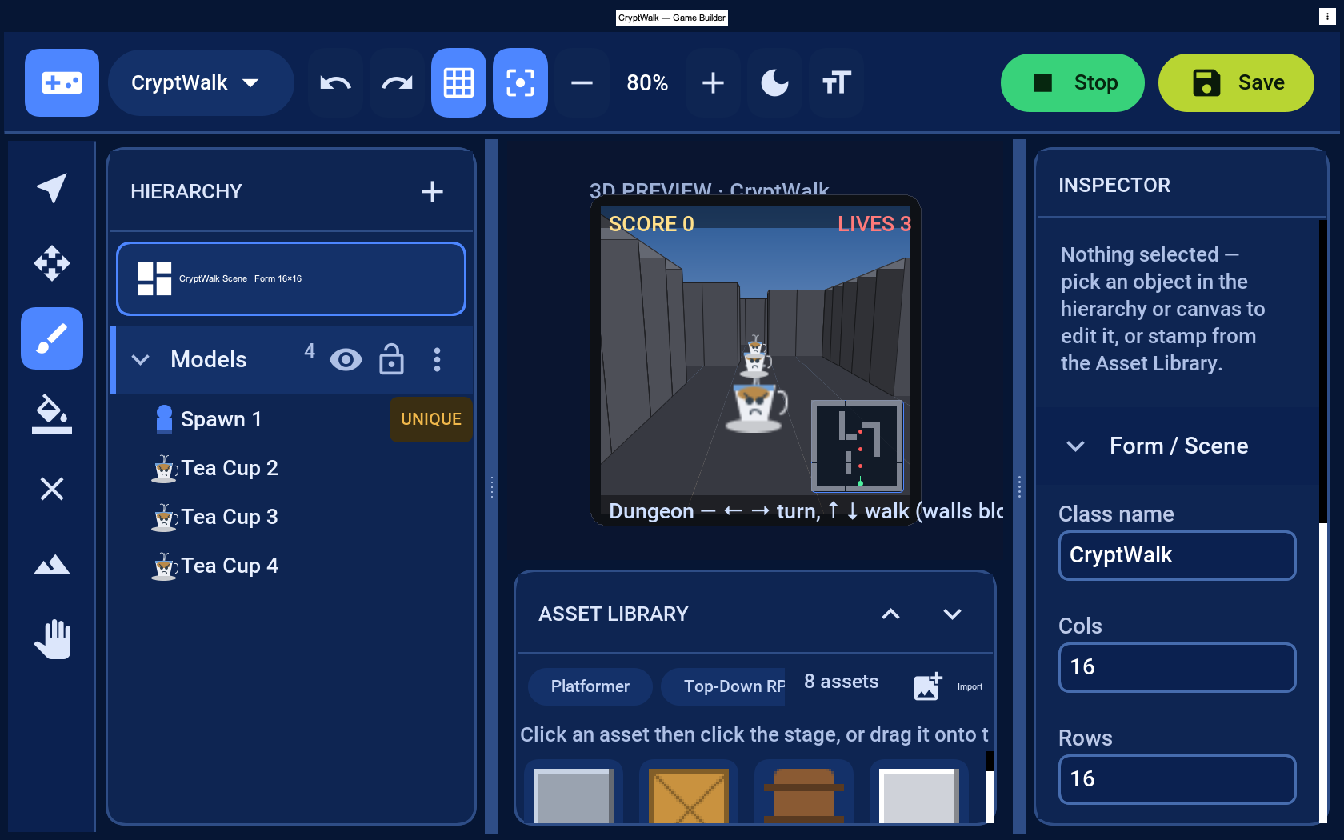
Live, you walk the corridor in first person and look around — the walls stop you, and the sunlit faces brighten or fall into shadow as you turn:

Coffee versus tea: fighting back
A maze to walk is a start, but Duke came down here to clear out the tea cups. From the 3D Kit, drop Tea Cup actors along the corridor — they’re the enemy — and give Duke a ranged attack: Fire (or the space bar) launches a coffee bean straight ahead.
In the preview the beans fly down the corridor, and a hit pops the cup and scores it. In a shipped game that’s an ordinary projectile loop in onUpdate — spawn a bean on the fire key, advance the live ones, and test each against the enemies:
private final List<float[]> beans = new ArrayList<>();   // {x, z, dirX, dirZ}

@Override
protected void onUpdate(double dt) {
    GameInput in = getInput();
    if (in.wasGameKeyPressed(Display.GAME_FIRE)) {
        beans.add(new float[]{playerX(), playerZ(),
                (float) Math.sin(yaw()), (float) -Math.cos(yaw())});
    }
    for (Iterator<float[]> it = beans.iterator(); it.hasNext();) {
        float[] b = it.next();
        b[0] += b[2] * 7 * dt;
        b[1] += b[3] * 7 * dt;
        GameElement cup = enemyNear(b[0], b[1], 0.5);   // your spatial test
        if (cup != null) {
            scene().remove(spriteFor(cup));              // smash it
            addScore(cup.getInt("value", 25));
            it.remove();
        } else if (hitWall(b[0], b[1])) {
            it.remove();                                  // bean spent
        }
    }
}
The cups are just elements whose assetId your code treats as an enemy — exactly the “your rules read the data” idea from Tutorial 1, now in three dimensions. Want them to fight back? Move each cup toward Duke a little every frame and cost him a life on contact.
Light and shade
Look up and you’ll see the sun. A 3D level carries one or more lights (the lights array in the .game), and the renderer shades every surface by how directly it faces the light: wall faces turned toward the sun are bright, faces turned away fall into shadow — which is exactly what gives the maze its depth as you move. That’s the whole point of having a visible light source rather than flat-lit boxes. Change the mood from code via getLight():
getLight().setDirection(0.3f, -1f, 0.2f)    // a lower sun casts longer, moodier shadows
          .setColor(0xfff2c14e)              // warm sunlight
          .setAmbientColor(0xff404858);      // fill light so shadows aren't pure black
On device this is real GPU lighting; the editor preview approximates the same sun angle so you can judge it while authoring.
Sculpting terrain (floors, hills, holes, ramps)
3D levels aren’t just objects on a flat plane. Select the Terrain tool and you can paint the ground itself: Raise/Lower elevation, carve holes (open sky a flight level can fall through), stamp walls, and Paint a surface material — grass, road, stone, sand, water. Painted elevation changes render as smooth slopes, not stairs, so a road can ramp uphill. The walker rides the terrain height and is stopped by walls and holes.
What got saved, and how it renders
Save writes src/main/resources/games/CryptWalk.game (loaded at runtime as /CryptWalk.game — the resource namespace is flat). A 3D level stores the play style, the placed elements (with elevation and per-object scale), and any terrain you sculpted:
{
  "mode": "3d", "cols": 16, "rows": 16, "tileSize": 1,
  "props": { "view3d": "dungeon" },
  "camera": { "eye": [0,8,14], "target": [0,0,0], "fov": 60 },
  "lights": [ { "dir": [0.4,-1,0.3], "color": "fff2e0", "ambient": "2a2f3a" } ],
  "elements": [
    { "id": "sp", "assetId": "spawn", "layer": "Models", "x": 8, "y": 14, "props": { "player": true } }
  ],
  "terrain": { "cols": 16, "rows": 16, "heights": [ ], "materials": [ ],
               "walls": [ "...a height per maze-wall cell, 0 elsewhere..." ] }
}
The companion is the same GameSceneView pattern as the other tutorials. The difference is realization: for a 3D level it builds one Model per element inside onSetup(GraphicsDevice) under a perspective camera with the level’s lighting — on the GPU. Your code still lives in onUpdate:
@Override
protected void onUpdate(double deltaSeconds) {
    GameInput in = getInput();
    // first-person controls (or let the built-in dungeon walker handle them)
    if (in.isGameKeyDown(Display.GAME_LEFT))  { turn(-1.4 * deltaSeconds); }
    if (in.isGameKeyDown(Display.GAME_RIGHT)) { turn( 1.4 * deltaSeconds); }
    if (in.isGameKeyDown(Display.GAME_UP))    { walkForward(3.0 * deltaSeconds); }
    // win when the player reaches the exit element, lose on a trap, etc.
}
The in-editor preview is a fast software approximation for iteration; on device the scene is rendered by the GPU-accelerated
GameSceneView.
Physics, effects and overriding defaults
Collision is handled for you — dungeon style stops the walker at walls and holes. For richer physics (projectiles, doors, movable crates) step a PhysicsWorld from onUpdate exactly as in Tutorial 1’s physics section.
Effects hang off the same loop. A concrete example — a footstep sound and a torch-lit light fade, both reading the level’s own data:
private final SoundPool sound = SoundPool.create(4);
private SoundEffect step;            // step = sound.load("/footstep.wav");

// in onUpdate, when the player advances a tile:
sound.play(step, 0.6f, 0f, 1f, 0);   // volume, pan, rate, no loop
getLight().setColor(torchLit ? 0xfff2e0 : 0x404858);   // brighten when a torch is lit
Overriding — the play styles are presets, not constraints. Want a hybrid (walk like a dungeon but with no wall collision)? Set open and add your own collision in onUpdate.
Menus and HUD in 3D
A 3D game has its own interface to manage too — a map toggle, an inventory, a “you died” screen, a pause overlay — and because GameSceneView is a Codename One Component, all of it is the ordinary UI toolkit, not a 3D-specific layer. Drop a Dialog for the death screen, a Toolbar command for the map toggle, a Container of item buttons for the inventory. Tutorial 1’s menu section applies unchanged — the game underneath happens to be 3D, but the menus are pure Codename One.
Scaling up: streaming worlds
A single 16×16 room fits in memory, but an open-world RPG does not. The gaming runtime supports a streaming, region-based world: terrain is paged in and out as chunks, the map is split into linked regions that load and unload around the player for seamless area transitions, and surfaces use pluggable materials. In the editor, New scene → Large World creates a region graph you grow with Add region (north/south/east/west); the active region’s streaming terrain is what you edit and preview. The same .game/companion pattern loads it.
The finished game and next steps
You have Crypt Walk: a navigable first-person dungeon with sculpted terrain and wall collision. From here:
- Enemies — place actors and, in
onUpdate, move them toward the player and cost a life on contact (the slime logic from Tutorial 1 ports directly). - A goal — mark an exit element and end the level when the player reaches it.
- Items and doors — collectibles open locked corridors; read a
key/lockedproperty. - Bigger maps — graduate to a Large World of streaming regions for a full crawler.
That’s the trilogy — mvn cn1:create-game-scene then mvn cn1:gamebuilder, and you’re building games by drawing them.